Methods
Due to COVID-19 social distancing restrictions and in the interest of making the most of our time while the tide is out, it is important that volunteers familiarize themselves with our survey methods and protocols before arriving at the study site. You will have questions! That’s okay -- it is easier to show than to tell, and we will review our procedures and answer any questions when we arrive at the site, but these instructions will prepare you as best as possible ahead of time.
We will be conducting quadrat surveys along a 30-meter transect within the rocky intertidal zone of each site at three elevations between the low tide and high tide points on the shore.

Materials:
-
We provide
-
50 x 50 cm quadrats
- 10 x 10 cm quadrats
- 30-meter transect tapes
- Data sheets, clipboard, pencils
- Calipers and plastic rulers (for measuring oysters,drills, and Fucus)
- Toothbrush (for brushing mud off of rocks and oysters)
- Squirt bottle or plastic tub for water (aids in rinsing mud off of rocks and oysters)
- Kneeling pads
- Orange marking flags
-
-
You provide
- Personal gear: Cloth face mask (if still required), rubber boots or shoes that can get wet/muddy, clothes (including warm layers) that can get muddy, thin work gloves (rubber dishwashing or gardening gloves work well), sun protection, water, snacks, etc.
In each quadrat, we are estimating:
- Percent cover of Fucus canopy
- Percent cover of oysters (visible without turning rocks)
- Total number of live oysters (on all sides of rocks)
- Number of drilled oysters (alive or dead)
- Number of oyster drills
- Numbers of invertebrates living under Fucus canopy and living in control plots without Fucus
- Length of up to 10 oysters
- Length and reproductive status of up to 10 Fucus thalli
- Length of up to 10 oyster drills
We are also measuring
- Vertical extent of oysters and Fucus along a 30-m stretch of shoreline
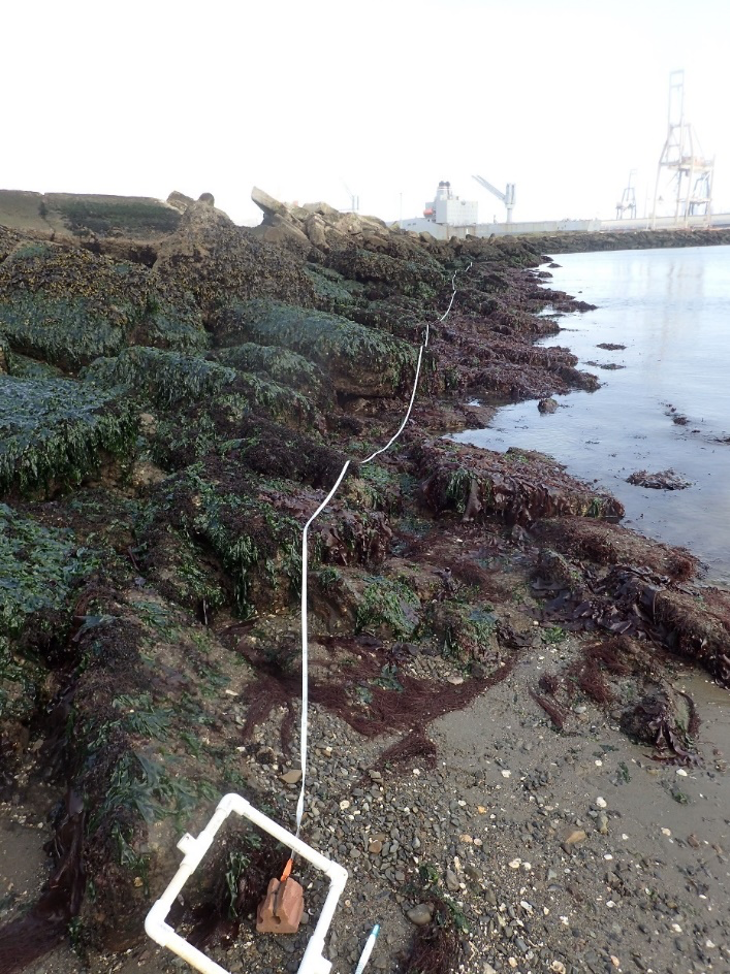
Step 1. Lay out transect
- Working in teams of two or more, hold the tape measure at a point in the target elevation zone while another person unreels the tape to 30 meters. (We will help you identify the correct elevation zone.)

Step 2. Place the quadrat along the transect:
- Place the left edge of the quadrat at the distance in meters specified on the data sheet. Alternate placing the quadrats above (shore side) and below (water side) the transect tape (i.e. alternate placing the bottom left and top left corners of the quadrat with the tape measure). It doesn’t matter which side you start with.
- We will repeat this ten times along each transect at randomly selected intervals along the tape measure.
Step 3. Estimate percent cover of Fucus and oysters in the quadrat:
- Hard substrate is rock large enough for an oyster to settle on (coarse gravel or larger), at least 2 inches in diameter.
- How to estimate percent cover:
- This is a visual estimate with an unavoidable degree of subjectivity, so don’t be concerned about being exactly “correct”. You will get the hang of it with practice! Comparing your estimate to another person’s (without revealing your estimate first) will make sure you’re in the right ballpark.
- Taking a bird’s-eye view of the quadrat, estimate how much of the area of the quadrat is occupied by Fucus canopy or oysters. Although the Fucus and oysters may be scattered unevenly throughout the quadrat, imagine pushing it together – does it take up half of the quadrat? More than that? Less? It may help to squint to generalize your view.
- You can also use the grid squares to add up the percent cover – there are 25 squares, which means each square is 4% of the quadrat. How many squares are occupied by Fucus or oysters? Multiply that by 4.
Step 4a. Count and measure live oysters:
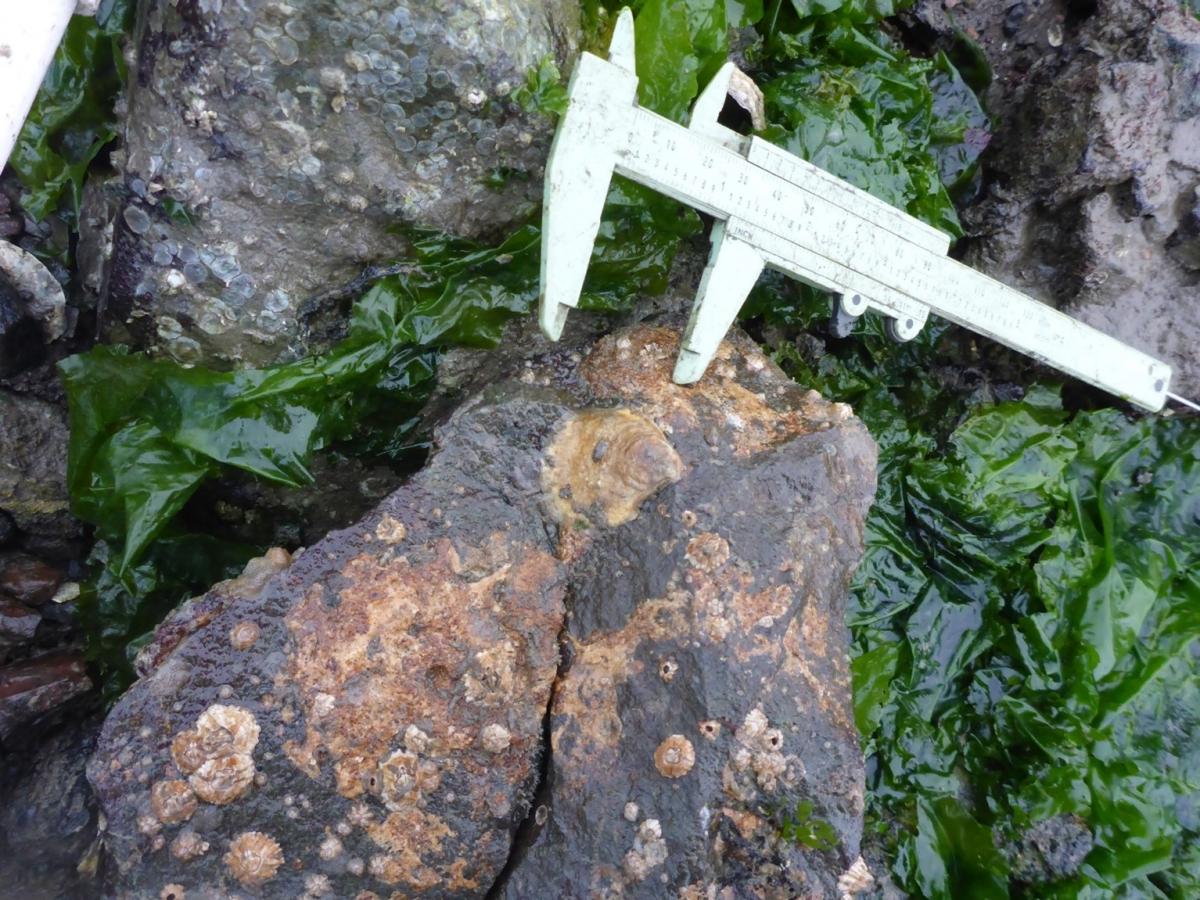
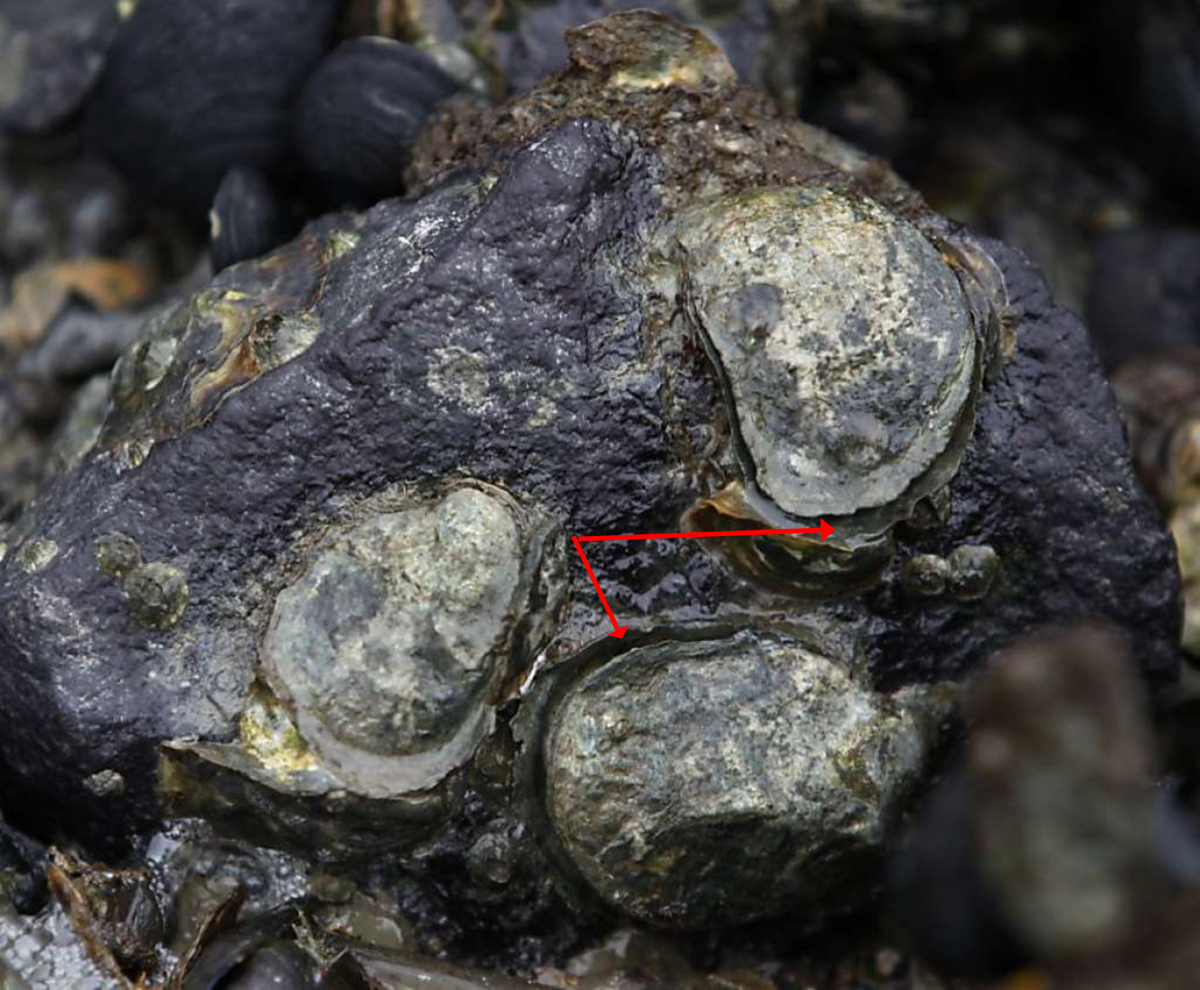
- Use the species ID guide to familiarize yourself with Olympia oyster morphology (physical appearance). They are identifiable by their ovular shape and uneven edges. Slipper limpets are a similar size and shape but have very even shape and, relative to oysters, smooth edges. Olympias may range in size from only a few millimeters to tens of millimeters. They are often gray and may have reddish-brown or black stripes. They may just look like a bump on a rock – use the toothbrush and Bay water to rinse off the area in your quadrat if it is muddy. One way to identify an oyster is to gently press down on it – if the shell wiggles slightly or if a little bit of water squeezes out it’s probably an oyster!
- Carefully pull back any algae growing on rocks.
- Take an overall count of live oysters in the entire quadrat. Check tops, sides, and undersides of rocks.
- Measure the oysters you find in millimeters using calipers. If there are more than 10 oysters, only measure the first 10 starting with the top left corner of the quadrat and moving left-to-right
Step 4b. Count drilled oysters
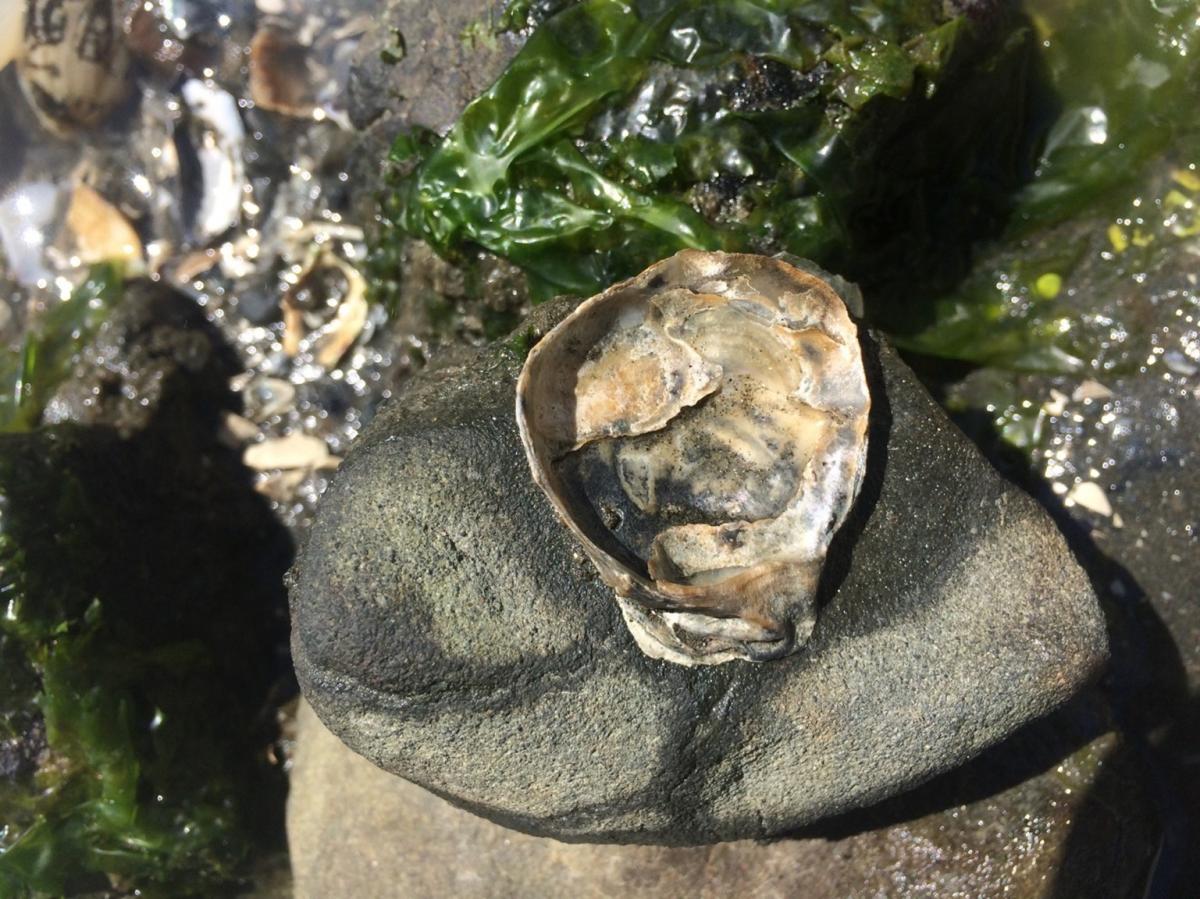
- We are only counting oysters that have died recently – these are empty oyster “boxes,” which means that both the bottom and top shell are present and attached.
- When only the bottom shell is present, this is called an oyster “scar”. Oyster scars may persist for many years and do not tell us much about the current condition of the oyster population at that site. The top shell of an oyster box, on the other hand, breaks off and washes away fairly quickly, indicating that it probably died fairly recently.
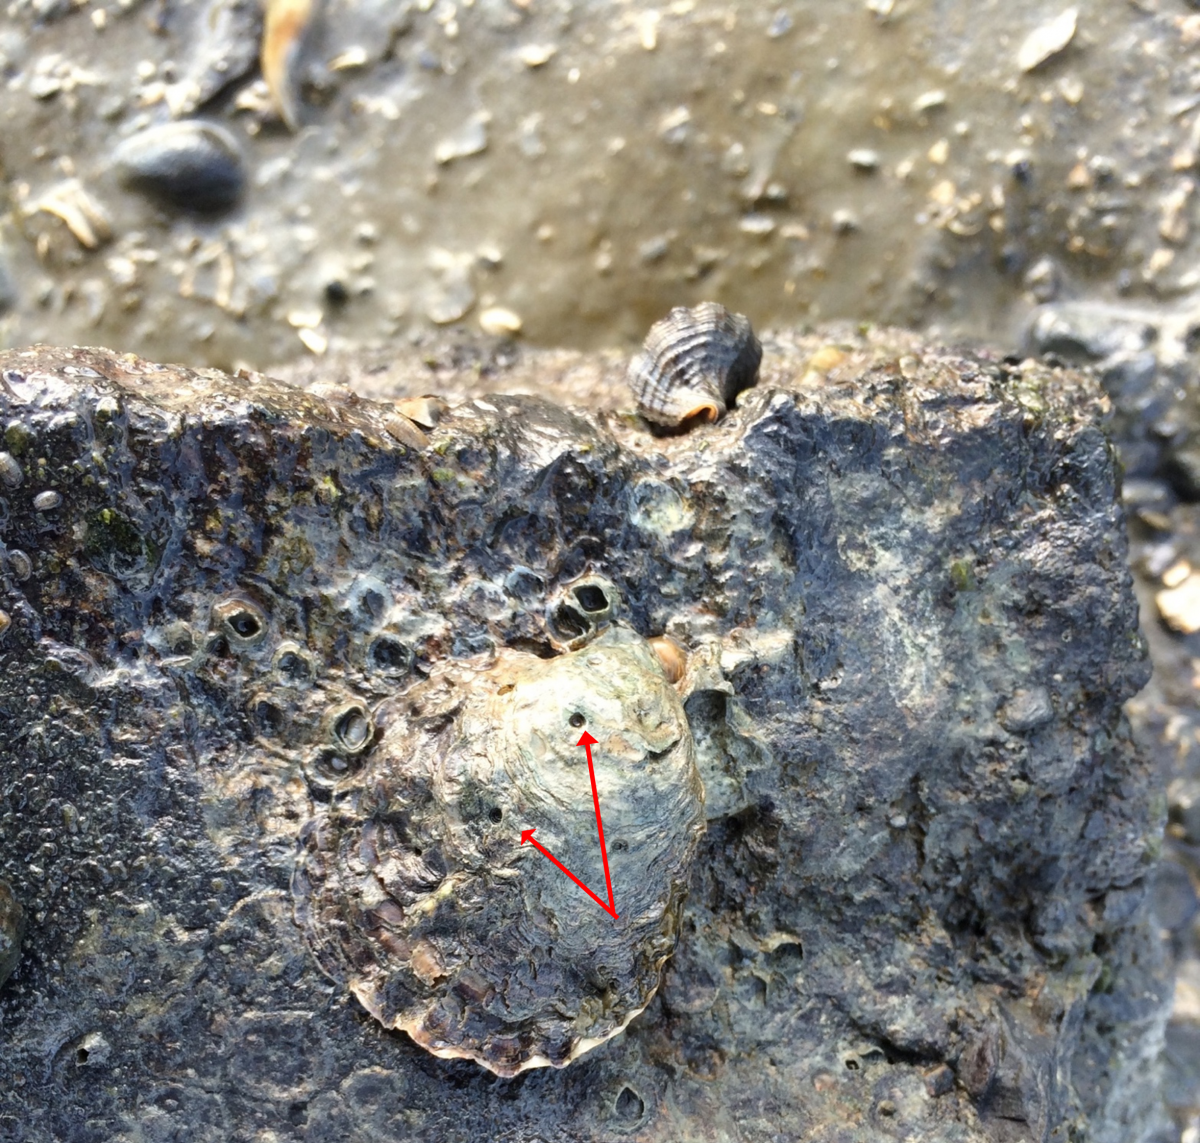
- Look for indications that the oyster was consumed by a predator. If it was attacked by an oyster drill, there will be a distinct round hole.
Sometimes the hole does not completely penetrate the shell, in which case the oyster may still be alive. Count live oysters with drill holes separately from dead ones; count dead oysters that still have their top shell but don’t have drill holes separately from those with drill holes. - Chipped edges may indicate predation by a crab; a broken top shell may indicate predation by a bird. These features are interesting to note, but we are not counting them.
Step 4c. Count dead oysters:
- We are only counting oysters that have died recently – these are empty oyster “boxes,” which means that both the bottom and top shell are present and attached.
- When only the bottom shell is present, this is called an oyster “scar”. Oyster scars may persist for many years and do not tell us much about the current condition of the oyster population at that site. The top shell of an oyster box, on the other hand, breaks off and washes away fairly quickly, indicating that it probably died fairly recently. Do not count oyster scars.
Step 5. Count and measure oyster drills:
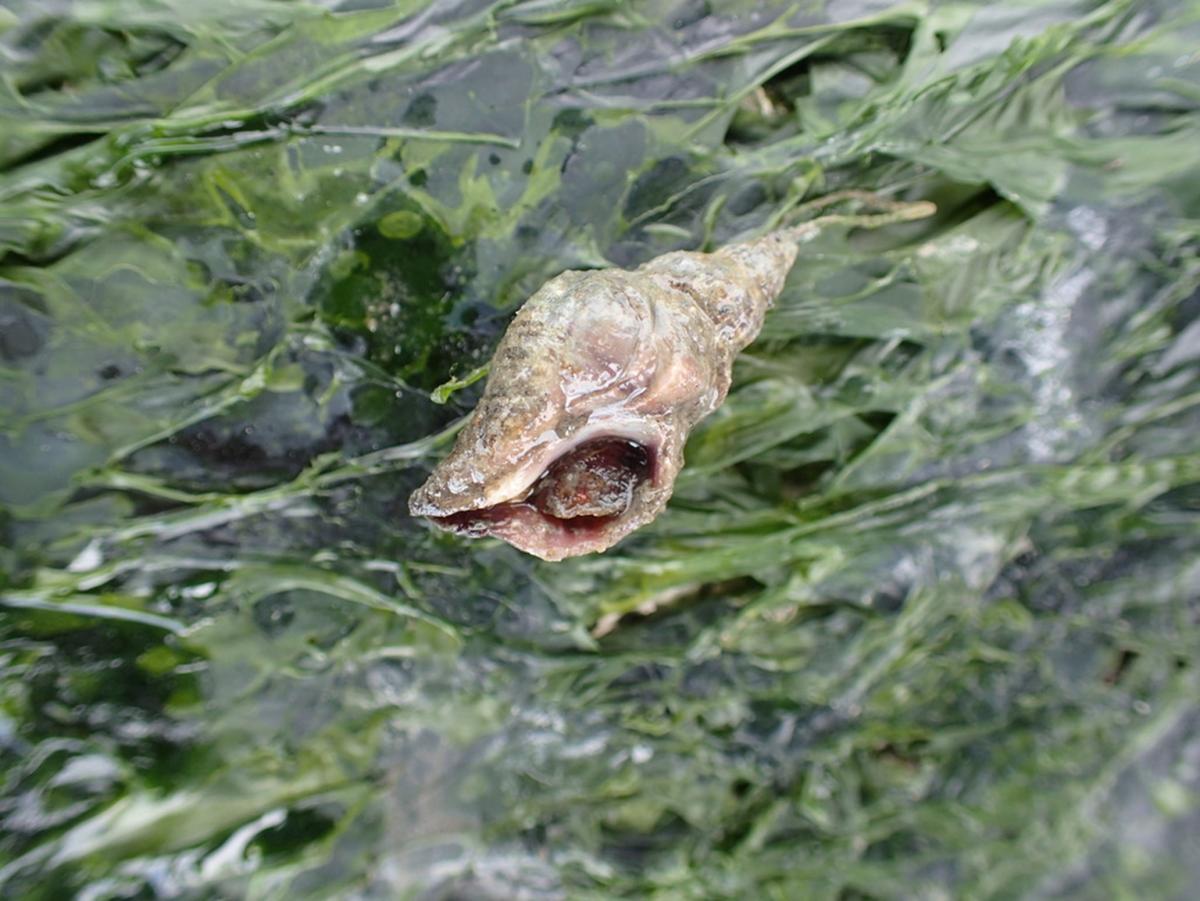
- Use the species ID guide to recognize Atlantic oyster drills. They are identifiable by their reverse hourglass shape and distinct spiraling whirls with ridges. They range in size from a few millimeters to approximately 30 millimeters. Oyster drills are mostly found on tops, sides, or bottoms of rocks and are easily spotted. They are occasionally found in the mud.
- Measure the oyster drills you find in millimeters using calipers. If there are more than 10 oyster drills, only measure the first 10 starting with the top left corner of the quadrat and moving left-to-right.
- Make a note if you find oyster drill eggs but do not count or measure them.
- Do not count dead oyster drills (empty shells)
Step 6. Measure Fucus and note reproductive status:
- Use your ruler to measure up to 10 Fucus individuals
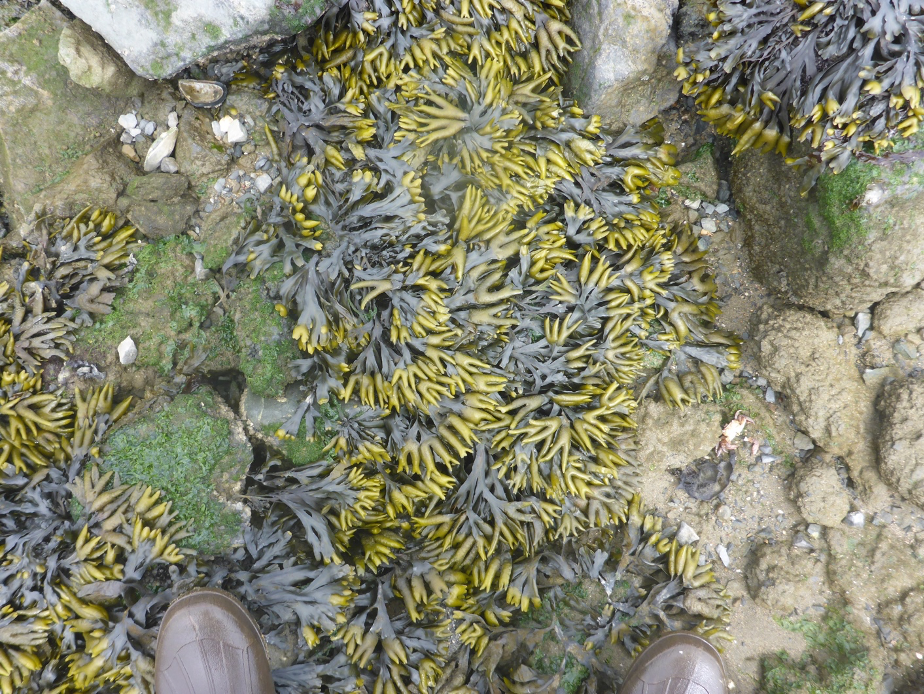
- For each individual you measure, note whether or not it is reproductive. Reproductive Fucus have balloon-like conceptacles and/or small bumps (receptacles) at the tips (see photo).
Step 7. Count invertebrates living under Fucus
- Using the small, 10 x 10 cm quadrat, haphazardly select 5 spots with Fucus and 5 spots without Fucus near the transect tape.
- In quadrats with Fucus: count oysters, drills, and other slow-moving or sessile invertebrate species you find underneath the Fucus canopy. Common invertebrate taxa are listed on the datasheet and shown on the invertebrate ID card. Write in the names of any other taxa you find. If you are not sure what the organism is, take a photo and write a description in the Notes field of the data sheet or ask one of us. We are not counting small, mobile species like crabs, fish, or isopods, but can make note of them if we see them.
- In quadrats without Fucus: count the same types of organisms living on bare rock
Step 8. Measure the distance from the transect tape to the 5 highest and 5 lowest oysters and to the 5 highest and 5 lowest Fucus individuals.
- Look at the shoreline area above and below your transect tape and locate 5 of the highest and 5 of the lowest oysters and Fucus individuals you see. This does not need to be an exhaustive search – we are just taking a sample to estimate their vertical range.
- Mark the locations of these individuals with orange marking flags
- Measure the perpendicular distance to the transect tape.
